Saturday, May 23, 2009
Subscribe to:
Post Comments (Atom)
 Do you remember the Polaroid type 55 and 665 PN pack film that gave you both an instant print and transparent large format negative? How could you forget?! We have a few dozen boxes of it in the freezer. The problem is that the stuff is priceless now, and it's hard to justify opening it up. Well, at least that has been a problem... up till now.
 Due to the overexposed nature of this shot I had held onto the goop side of this print, which had dried and left a crusty barely visible rendition of the positive. Below is a reflective scan of the goop with a mega-boost in contrast.
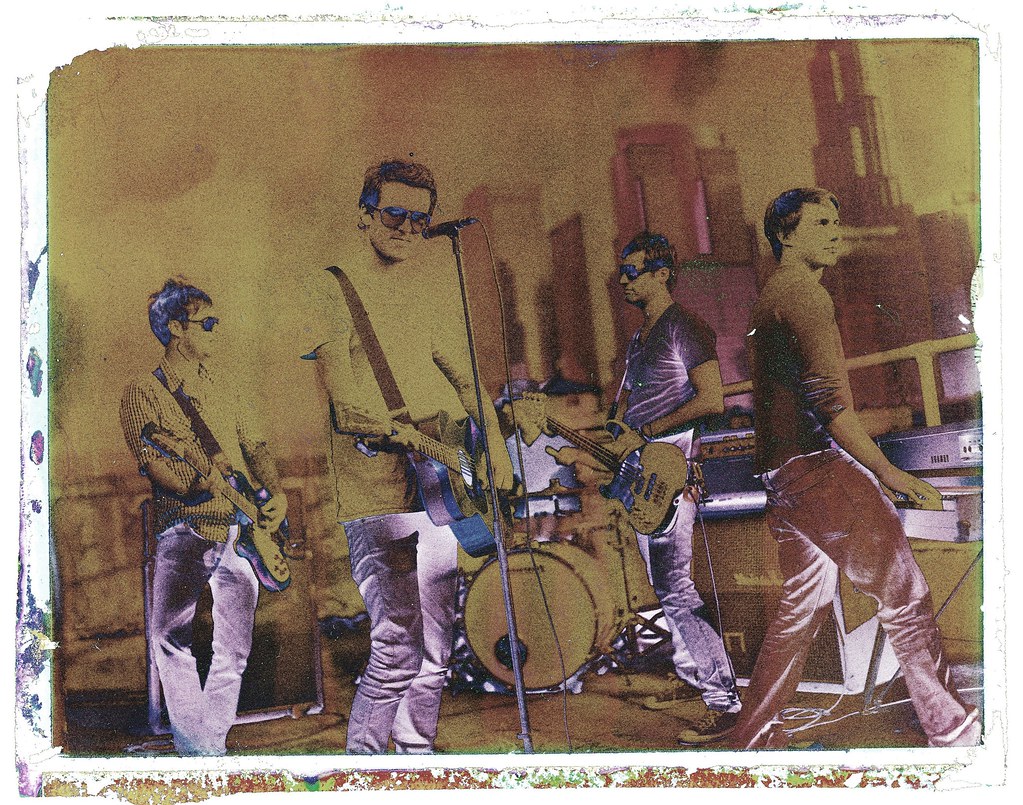 So the next thing we did was revolutionary. We stripped the backing off and scanned a transparency! The emulsion side still had the crusty chemistry on it, but we had to see how it looked.
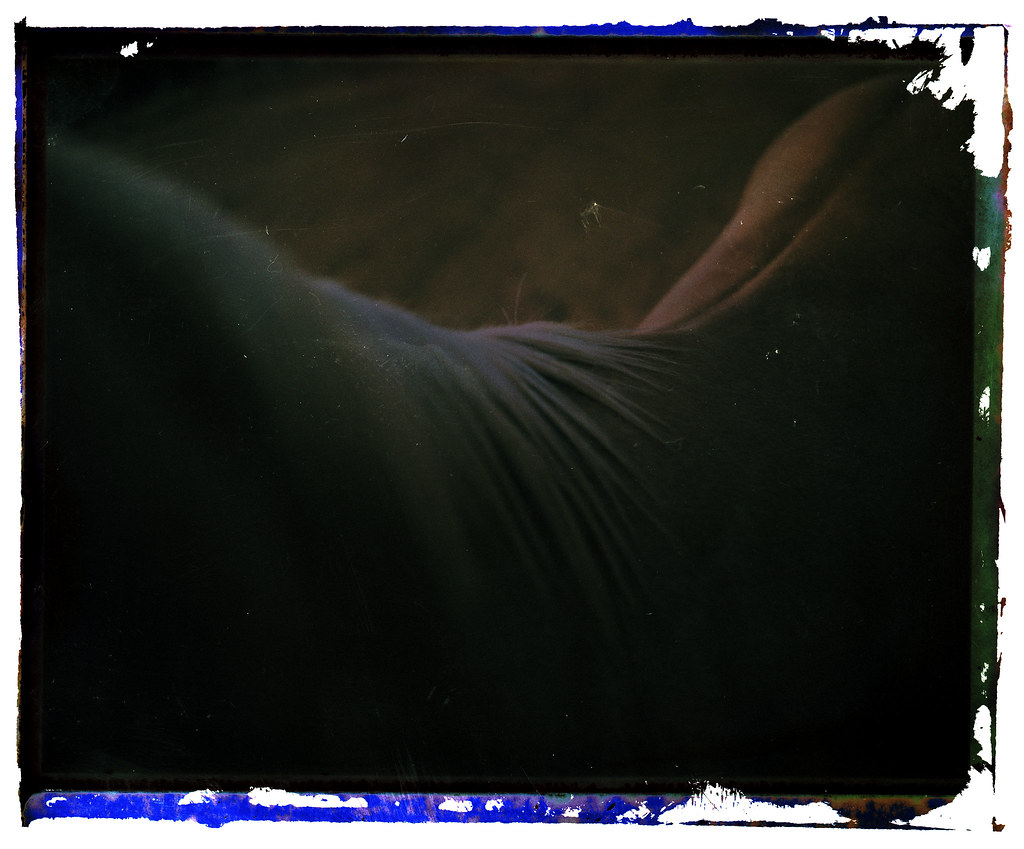
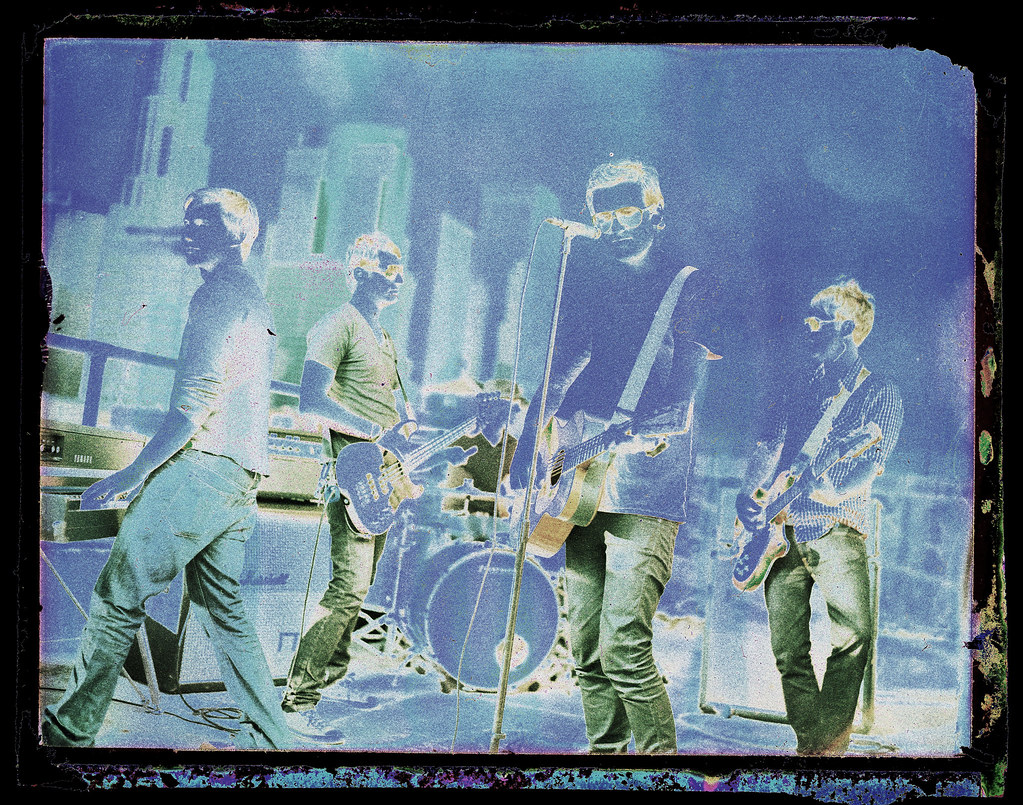 As you can see, the goop left on the negative has completely solarized the image. So now all we had to to was wash and fix it. We used Ilford black and white negative fixer and fixed for 10 min. We quickly discovered that the longer it fixed the cleaner it got, the clearer the base became. The scan below was performed after fixing it for quite a while. The reason it has a sepia tone to it is due to the fact the the emulsion hadn't dried down yet.
 As you can see in the overexposed areas the is still some goop leftover. So, back in the fixer it went. We just let it sit overnight. I think, due to sitting around a couple months the chemistry had bonded pretty well. Our future experiences have been much cleaner. The next morning we dried the Negative and washed it in Photo Flo. Here is the scan!
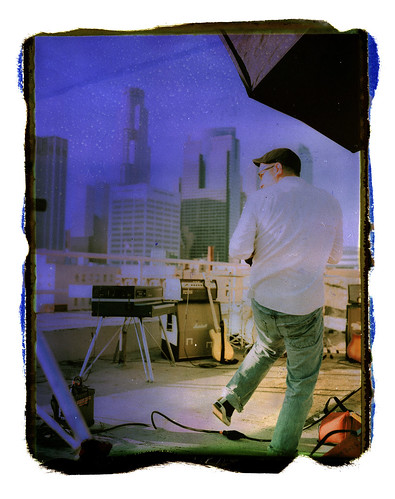
 This image is still a bit overexposed and has some dame to it, but it proved to be much sharper than the print, and maintained much more detail. I would always recommended washing and fixing your negs asap with this process. The results can be stunning. The resolution is fantastic, and it has a look very similar to x-processed slide film. Below I'll include a few more that we have shot since this discovery. As you can see, we have experimented with the exposure and gotten a little messy with the bleach for different looks. These negative are extremely durable in water, but just be careful not to get the bleach on the emulsion side. Applying this process to Fuji FP100b to produce an amazing B&W negative is the next step. Stay tuned...


13 comments:
At the very least, it makes for some cool-looking pants.
that's awesome guys - you guys own it - look to read your stuff and amazing pics
Nice.
This is fantastic. Thank you!
Thanks guys! Spread the word about this process. I really want to see what others get out of it. Send us back any feedback or other tips.
Bru: I clicked your photo to see what Land Camera that was. What are ya shooting? I really enjoyed your website too. Excellent photojournalism.
Thanks, Brian! It's a 450. I've also got a Miniportrait 202.
Question, when you're washing the negatives, are you rubbing goop off? I've already cleaned the backs of 9 pulls I had sitting around. This is such an exciting process.
Rub the goop off under running water. That should be a prep step before you tape it down or fix it. We have started to rinse off the goop in a sink while we are out, and follow up the rest of the process at home.
Alright, I'm back for more. After re-reading the post a couple times and meticulously digging through some other resources online, I've managed to get the color process down...almost.
First - what's your dilution ratio for your fixer?
Here's my process so far:
1. Wash under running water to remove excess developer.
2. Tape down and use bleach to remove black backing. Rinse away excess bleach.
3. Fixer bath. Slight agitation.
4. Rinse bath, with Photo-flo. Slight agitation for 20-30 seconds. Hang dry.
Here's the problem I ran into along the way. I started with "old" pulls - about six weeks or so. I cleaned them all, but when I got to fixing I decided to test it with one negative. Figuring that it was "old enough" I left it in the fix bath overnight. When I came back to it in the morning, I had an extremely faint image.
I tried again, with pulls from the same day, and fixed for a shorter period ~ 2 hours. My negatives cleared up a bit, but they still look more faint than I expected. Two of these turned out with almost positive images [and a strong color cast].
I tried one more and fixed for only 2-3 minutes, and was struck by how much image was lost.
Anyway, I know this is hardly a precise process, but I thought I'd ask for your thoughts. Maybe my fix bath is just too strong.
In other news, I've got a stable negative from a fresh 100B pull. Getting one from a dried pull is trickier. Good luck, and thanks for all the help.
@Bru
I use the standard fixer dilution I use for my negative film. I fixed the band shot over night and the image became less solarized. I even tried fixing one without any dilution in ilford fixer. It all seemed to work fine with no adverse effects on the images. The dye and silver left from the image don't get removed through fixing. Just the excess chemicals and junk.
I have noticed that the images that are more overexposed seem to deteriorate and come out more solarized in the highlights. I've yet to have a shot be not dense enough. A somewhat thin neg actually has seemed to be better for scanning and maintaining good detail from highlights to shadows. The first one in this post was actually about two stops darker in the print than the how negative scanned. I had to darken the scan a bit. The shots on the roof were a half a stop overexposed resulting in gritty dense highlights.
Also, the longer you leave the chemistry on the negative or expose the negative to light after peeling tends to result in that solarization effect. I would recomend you try cleaning your negative off sooner and fixing longer with stronger fixer. Maybe... You'll just have to keep trying.
And don't worry about the emulsion when you clean the negative. It's really tough! Rub it with a wet paper towel under cold running water. Just keep the bleach away from it!
Also, try rinsing the negative in running water for 5-10 min after bleaching the back off and then adding the photo-flow for 30 seconds.
In the end I know that you can get clean beautiful negatives out of this process. But sometimes the sloppy deteriorated effect may be exactly what you're looking for. Just keep trying stuff and have fun with it! :)
Best of luck!
Here is a revised version of how to get the best negatives!
Our tips:
-Let the print develop double the recommended time before peeling to prevent solarization. Fuji's pack film is self-terminating so you could let it process for hours without any adverse results!
-First remove the black with extra strength bleach and then clean the negative. The excess chemistry actually protects the emulsion a little.
-Cover the emulsion/goop side with masking tape. Don't tape it down to anything!
-Set the negative face down on an old towel when removing the black back. The towel absorbs most of the bleach before it bleeds around to the emulsion side.
-Clean the black off with extra strength bleach, a toothbrush and a paper towel. Have your toothbrush in a cup of water and dip the toothbrush in the bleach, scrub the black, wipe with a paper towel, dip the toothbrush in water then bleach again and repeat until the neg is clear.
-last remove the masking tape and rinse in cool running water. After it's dried everything is ready to scan. We have found that fixer is really unnecessary in this process.
Thanks For The posts...are you putting tape directly on the emulsion side? your last post said "Cover the emulsion/goop side with masking tape. Don't tape it down to anything!"
Is that correct?
Thanks
Clay
@Clay
There is no "right way" to do this. Just don't get the bleach or even the watered down bleach on the wrong side. I usually just put it face down on a old towel and start scrubbing. But masking tape on the emulsion side helps too.
Greetings from Prague...I havent been this excited about something since I printed my first neg 40 years ago...I am all over this..thanks so much for sharing this fantastic process...I've missed Type55 terribly since it went away...this is very encouraging.
Cheers Amigo
Larry Horricks
Prague, Czech Republic
www.larryhorricks.com
Post a Comment